How to setup and test optical inputs and outputs in Control for Element units?
For the Apogee Element units, Optical Output channels are not visible in the Control app.
Only Optical Input channels can be shown. Click the "Channel View" button in the Device Sidebar to show or hide all input channels. Optical input channels will be displayed based on your selected optical format.
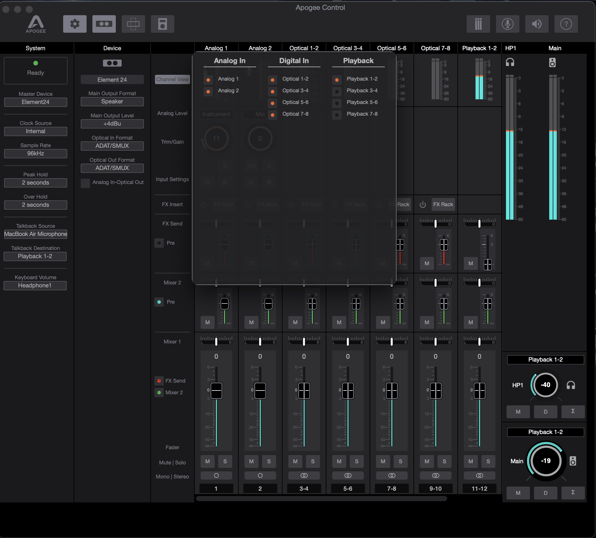
It is not possible to send audio through an optical output in the Control app directly.
All optical output routing needs to be done in your DAW.
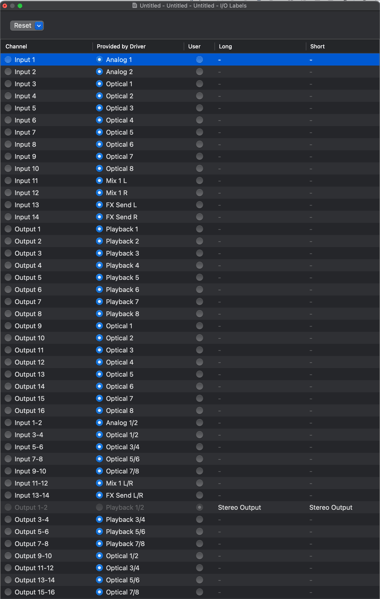
If using Logic Pro it's helpful to go to Logic > Mix > I/O Labels and make sure all input and output labels are selected as "Provided by driver" as this will show the correct labeling for all optical I/O in Logic.
The test signal is being sent correctly through your optical outputs by sending any audio in your DAW through Optical Outputs 1-2. Then connect an optical Toslink cable from Element's optical OUT port directly back to the optical IN port.
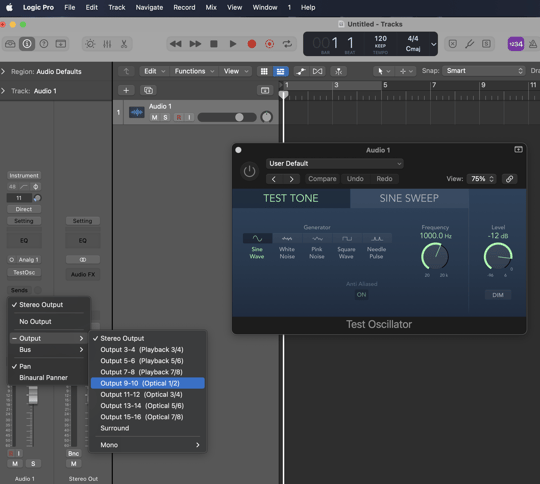
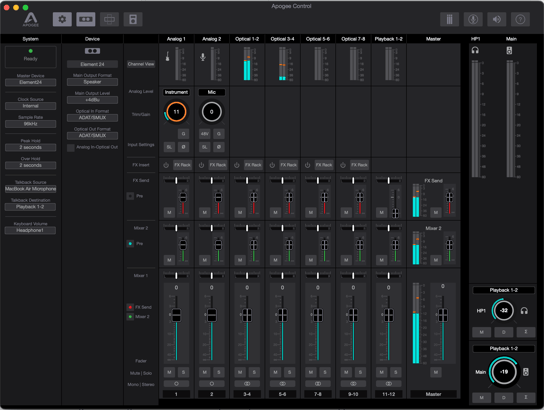
Once complete, send audio through Optical Out 1-2 in your DAW and you should see this signal metering back in on Element's Optical Inputs 1-2 in the Control app.
Then test and verify signal is being sent correctly through your other Optical Outputs 3-4, 5-6, etc, and if this signal is returning back to the optical inputs 3-4, 5-6, etc in the Control app.
It's also important to note that you will want to de-select the "Analog In-Optical Out" button in Control when testing this.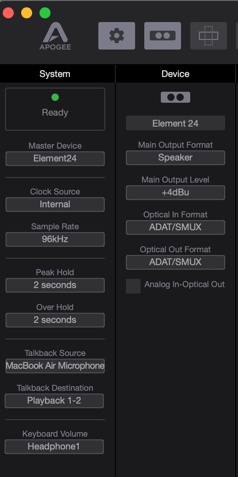
When this "Analog In-Optical Out" is selected this will automatically enable your Analog inputs to pass through the Optical Outputs as listed here for each unit:
-
Element 24 - Analog input 1 - 2 > ADAT output ch 1 - 2
-
Element 46 - Analog input 1 - 4 > ADAT output ch 1 - 4
-
Element 88 - Analog input 1 - 8 > ADAT output ch 1 - 8