Setting up Jam Plus in GarageBand
GarageBand has some great amp simulations, and setting them up with your Jam Plus is super quick.

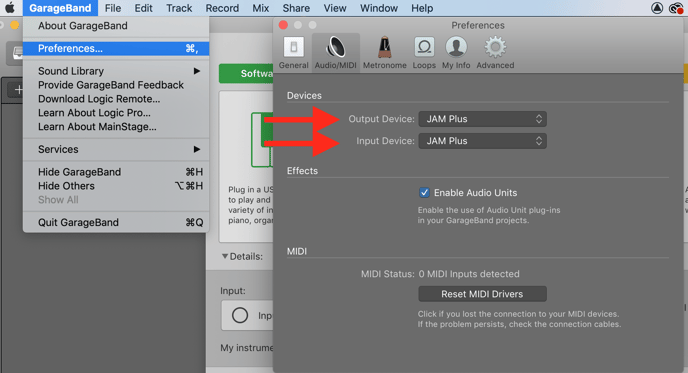
As you can see, GarageBand will generally ask you if you would like to use your Jam Plus as the input device as soon as you launch the new session. If it doesn't, you can manually select it by going to GarageBand > Preferences > Audio, and setting it as your input/output:

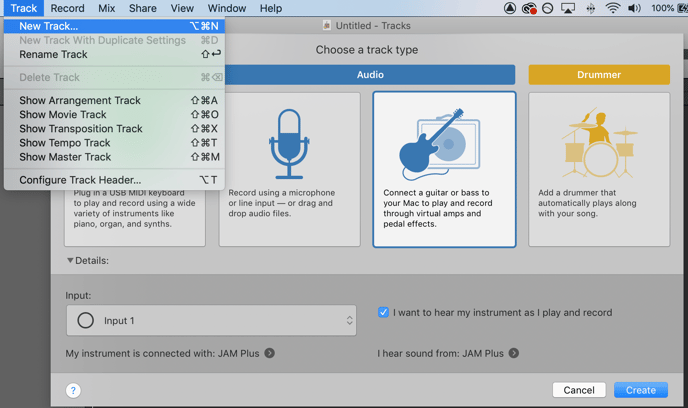
After that, you can make a new Audio track, and select the Guitar/Bass option:
From this window, you can also enable Input Monitoring, by checking the "I want to hear my instrument as I play and record" box. This will let you listen back to your instrument through the GarageBand Amplifier in real-time, letting you record or practice with these amp sims.
For more info on using your Jam Plus, here is the Jam Plus Quick Start Guide: