- Knowledge Base
- BOOM
- Getting Started
-
BOOM
-
Duet 3
-
Symphony Desktop
-
Symphony I/O Mk 2
-
Jam X
-
HypeMiC
-
MiC +
-
ClipMic digital 2
-
Groove
-
Jam +
-
MetaRecorder
-
Plugins
-
Apogee Control Remote
-
FAQ
-
Legacy Products
- AD-16x & DA-16x
- AD-16 & DA-16 (non-x versions)
- AD-8000
- AMBEO Smart Headset
- AMBus Cards
- Big Ben
- Duet (Firewire)
- Duet 2
- Duet for iPad/Mac/PC (USB)
- Avid Pro Tools Duet
- Element Series
- Ensemble (Firewire)
- Ensemble (Thunderbolt)
- GiO
- Jam
- Maestro App
- Maestro 2
- MiC
- MINI Products
- One
- One (iPad, Mac, PC)
- PSX-100
- Quartet
- Rosetta 200
- Rosetta 800
- Rosetta AD
- Sennheiser ClipMic
- Symphony32 PCI Cards
- Symphony 64 PCIe & Thunderbridge
- Symphony I/O Mk 1
- Symphony Mobile
- Trak2
- X-Digi-Mix
- X-FireWire
- X-HD
- X-Symphony
- X-Video
-
First Take
How to use the inputs on BOOM
Boom can receive input signals from the following sources:
- Microphones
- Instruments
- Line-level outboard gear
Input 1 can accept any of the sources above, while input 2 can accept instruments and line-level sources.
To set the input source, you'll use the Control 2 software:
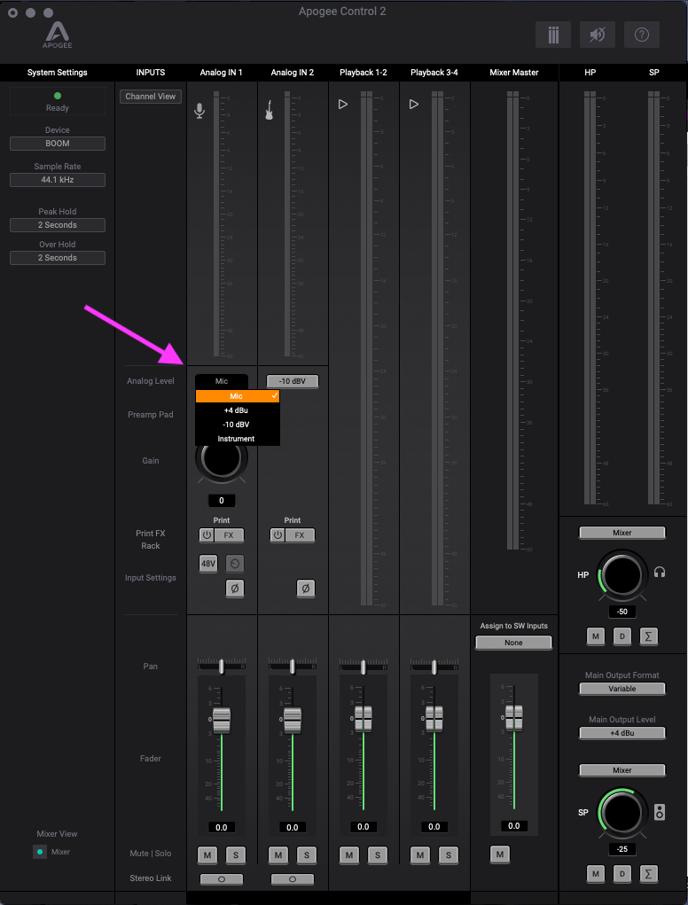
For microphone or instrument sources, you can use the gain knob below the input type selection drop down to adjust the gain: