How to record and monitor with HypeMic, Mic+ or Jam+ in Garageband on Mac
When any Apogee Mic and Jam interface is connected to a Mac it will automatically be detected in System Preferences > Sound > Input and Output as a USB audio device you can select and use.
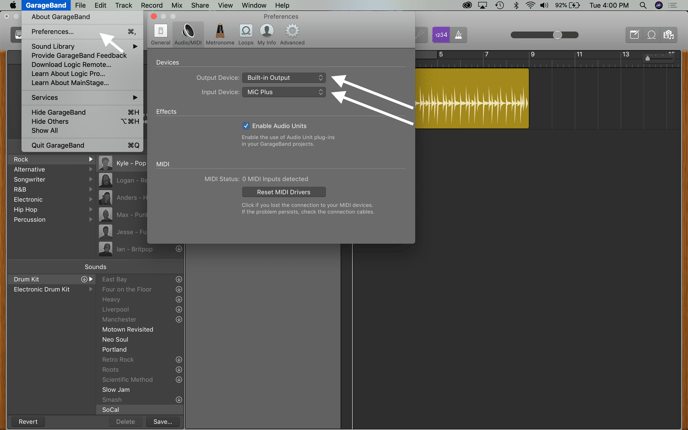
When you open Garageband select your Apogee interface as your input and output device in Garageband > Preferences > Audio / Midi.
In this example, Mic+ is selected as our Input Device and the Mac Built-in Output is selected as the Output Device.

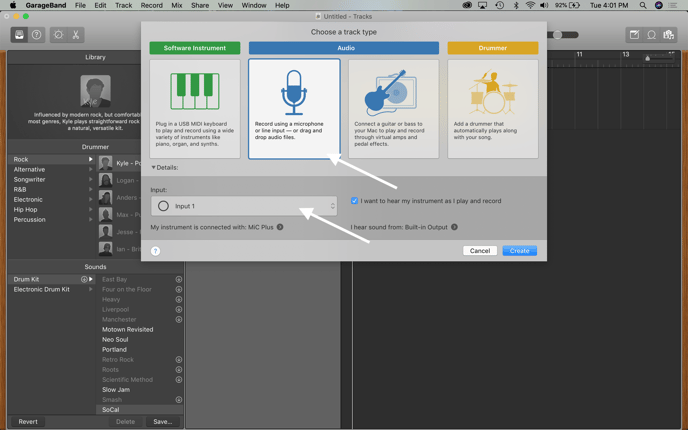
Go to Track > New Track and select the Mic icon under Audio and Input 1 to create a new audio recording track. You'll also want to check the box to "hear your instrument as your play and record" to turn on monitoring. 
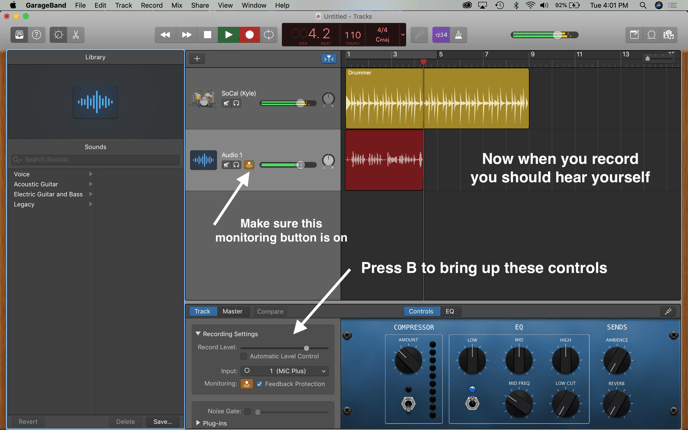
Select your Audio track then tap B on the keyboard to bring up the Track Controls.
You can set your input level for Mic with the Record Level slider or with the input gain knob on your Mic / Jam itself.

It's best to un-check "Automatic Level Control" to prevent Garageband from automatically adjusting your input gain when recording.
Click the Monitoring Icon to enable input monitoring, then you will be able to hear your input when recording and playing back other audio tracks.