What You'll Need
- Symphony I/O with Dante + PTHD Option card installed
- Mac or PC Computer running the Dante Controller application - free download at https://www.audinate.com/products/software
Step-by-step
1. Install the Dante Controller application on your computer by clicking on the download package and following on-screen instructions.
2. Using a Cat 5E or 6 Ethernet cable, connect the Symphony I/O Dante option card Primary port to a network switch or directly to your Mac or PC computer. If you're using a Mac laptop, you'll need an Ethernet to Thunderbolt or Ethernet to USB adaptor.
3. Power on Symphony I/O.
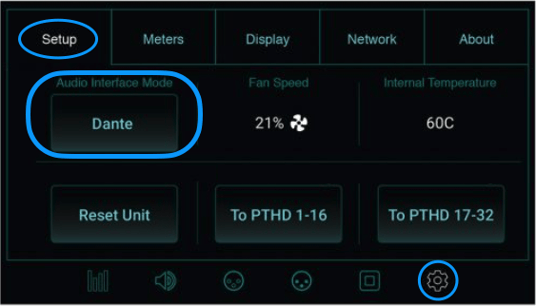
4. Set Symphony I/O to Dante audio interface mode (AIM) - On the front panel OLED, tap the Settings icon, then tap the Setup tab.
5. If Audio Interface Mode is not set to Dante, tap the Audio Interface Mode button, then tap “Yes” to confirm the change of AIM. If a Thunderbolt card is installed, repeat until Audio Interface Mode is set to Dante.
6. Launch the Dante Controller app - after a few moments, Symphony I/O should appear in both the Transmit and Receive lists.
7. If Symphony I/O doesn’t appear, click the “Reload Device Information" button in Dante Controller.
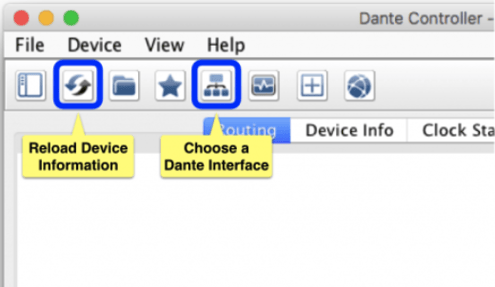
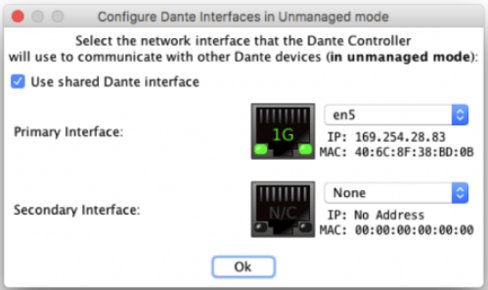
8. If Symphony I/O still doesn’t appear, click the “Choose a Dante Interface” button and choose another network. If multiple networks are present in the Primary Interface dropdown, choose the first 1G network available.
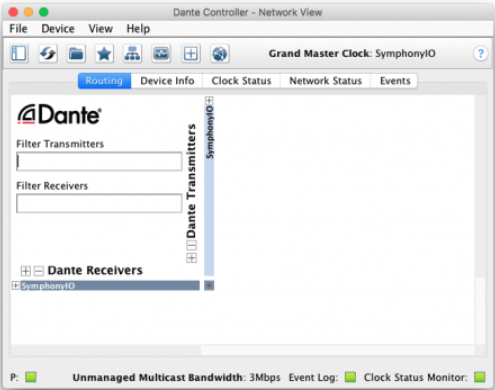
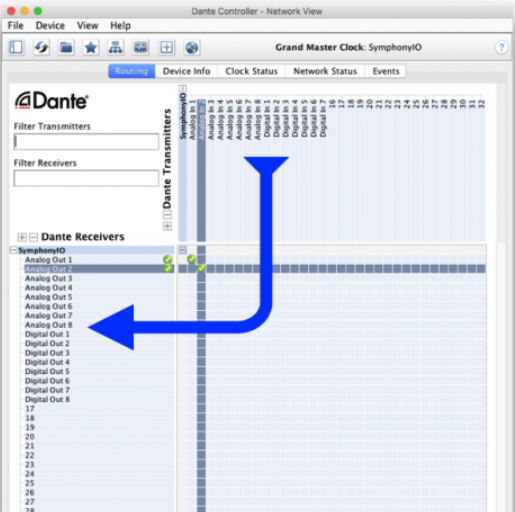
9. In Dante Controller, click the Routing tab
10. Click the + icons to expand Symphony I/O Receivers and Transmitters lists. Keep in mind that transmitters are signals TO the Dante network from Symphony I/O module inputs, while receivers are signals FROM the network to Symphony I/O module outputs. Audio flows in the direction indicated by the arrow below.
11. Connect an audio signal to Symphony’s I/O module inputs 1-2, then connect speakers to I/O modules outputs 1-2.
12. On the Dante Controller routing grid, click at the intersections of Transmitter 1-2 and Receiver 1-2. Once the subscription (connection) has been established, audio flows from the I/O module inputs 1-2 to I/O module outputs 1-2.
13. Once you've verified that audio is passing from inputs 1-2 to outputs 1-2, you're now ready to connect Symphony I/O to other devices on your Dante network!
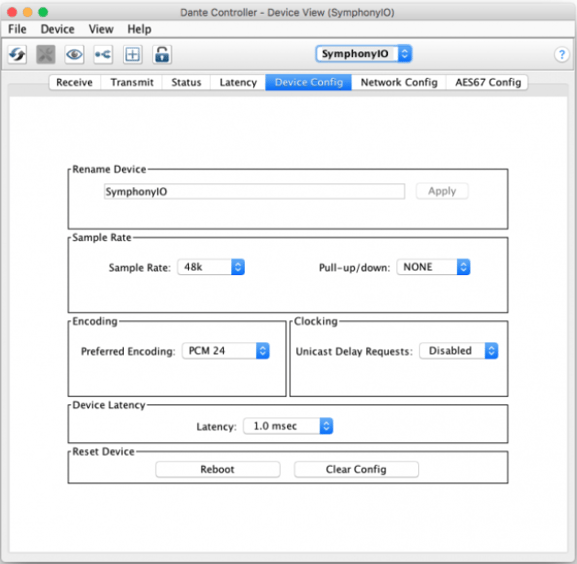
14. To set the sample rate, choose Device Device View or double-click on the Symphony I/O transmitter or receiver label.
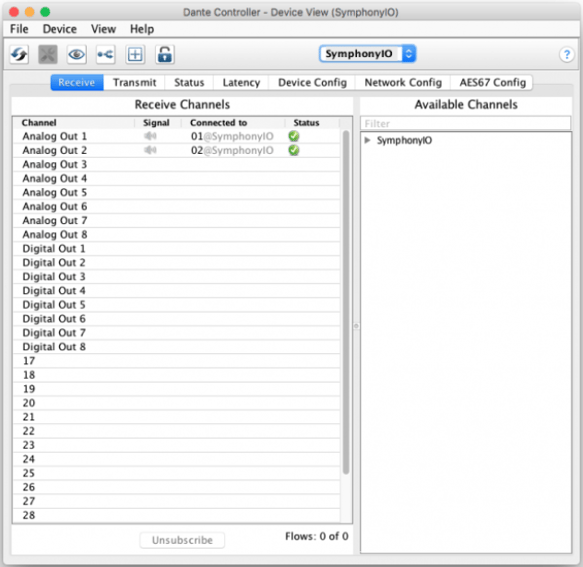
15. In the Device View, click the Device Config tab. Set sample rate with the Sample Rate dropdown. You can also change the label of the Symphony I/O in this window.
16. Symphony I/O Transmit and Receive channel labels may be customized in the Device View Receive and Transmit tabs. Routing is easier when you label transmit and receive channels with their corresponding I/O module input and output names.