ClipMic Digital 2 Tips & Tricks
Clip MiC Digital 2 is a super intuitive way to capture great audio - with a little bit of setup, we can get even better results!
Proper Mic Placement:
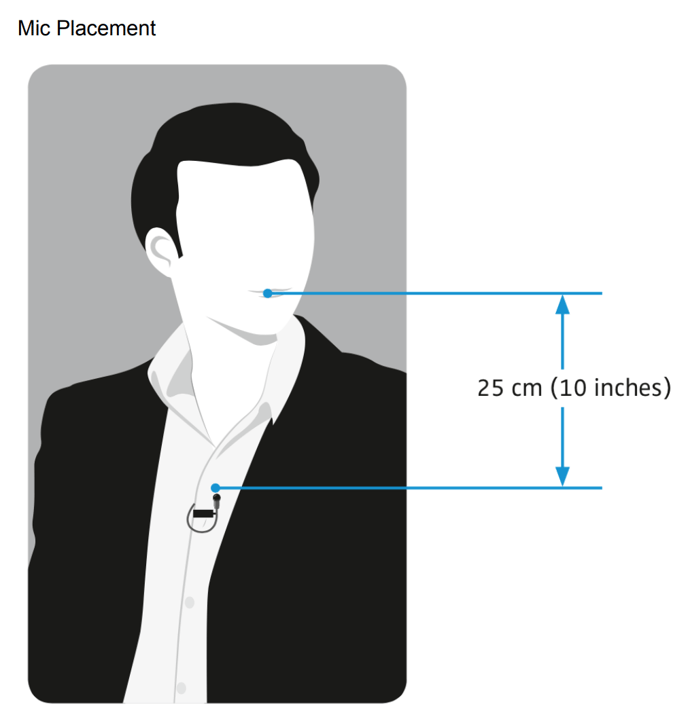
As shown in the image below, we generally want the ClipMic about 25 cm (or 10") from the mouth of the wearer.

While this can vary from case to case, this is the ideal starting place for setting gain level, and capturing crystal-clear audio.
Using the Apogee Maestro iOS App for Added Control:
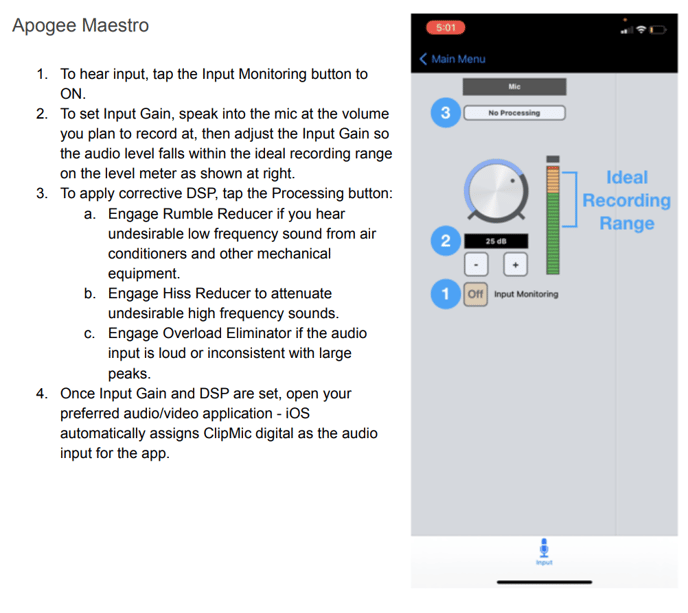
The Apogee Maestro iOS App allows us detailed control over our input levels, as well as the opportunity to enable Onboard Processing.
 Check out this video on configuring your ClipMic Digital 2 for Zoom, and other conferencing apps:
No headphones are required!
Like Cody says in the video above, the ClipMic Digital 2 does NOT require headphones when using conferencing apps. Unlike other microphones, ClipMic will not feedback when using it in conjunction with your built-in speakers!